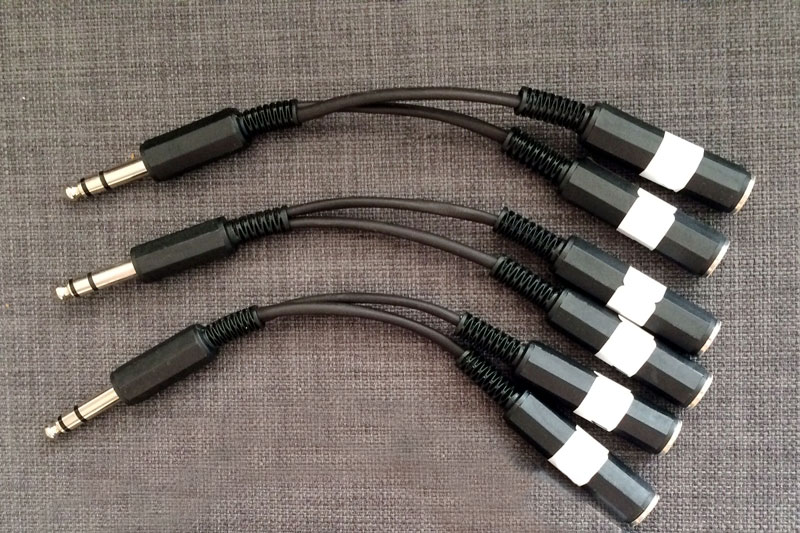
Drum splitter settings can be very confusing for many edrummers. Trigger splitters are awesome, because they allow you to expand your drum set easily, effectively and cheaply, especially when compared to buying another module.
Are you having problems with your electronic drum trigger splitters? Do you need help? Ok, you came to the right place. We will get you on the right path to making these simple devices work perfectly, or at least as close to perfectly as possible given your specific set-up. This is part 2 of a 2 part series on splitters. You can find part 1 here.
Basic Electronic Drum Splitter Settings
So what changes do you need to make inside your module in order to make a drum splitter work? Different types of splitters might have case-specific recommendations, so it is always best to read any documentation and/or instructions that come with the product before making any attempt to use it. However, there are some aspects of configuration that apply to virtually all drum trigger splitters. Let’s take a closer look:
Usually, the splitter will tell you what default pad type to select in the module. If not, then you can try the actual pad you are actually using and if that produces poor results, then you can try changing it up until the results improve. You might be surprised to learn that the pad selected in the module which produces the most accurate results might be nothing at all like the actual pad you are using. We tend to use Roland PD128 on many splitters and it usually works really well. Be patient when using splitters, it might take a bit of time to configure them on some sets.
Always work on configuring the proper settings for the head portion of the pad before working on the rim. Rim settings always build on the existing head settings, so this is logical. Once the head is working perfectly and predictably, then you can advance to the rim section. This is where you will really have to put a bit of time into the process…
Here are the drum splitter basic settings that will need some attention:
There are a few basic parameters that will need to be adjusted in order for the splitter to function optimally. Let’s look at how each works:
Threshold describes the amount of force needed on the pad to cause it to trigger a signal to the module. Higher threshold will make soft hits not trigger at all. Lowering the threshold will make the pad more inclined to triggering soft hits, but may also leave some pads susceptible to false triggering from sympathetic vibrations. Try to find the best spot where your lightest hits are still registering on the module, but where the pad is not false triggering or mistriggering when you hit other pads near by. We always tend to advise keeping the threshold on all edrums as low as possible, even when you are not splitting head and rim.
Sensitivity is the attribute that determines how much velocity will be attributed to any given hit. Usually, this ranges on a numerical value from 1 to 127, although some modules go beyond this range, like the newer Roland Flagship modules. Sensitivity is easy to adjust. Simply make sure that you softest hits are registering at a very low number value and that you hardest hits (or hardest PRACTICAL hits if you DO NOT want to hit so hard) register 127. Once again, we usually advise against setting the sensitively so low that only the absolute hardest hits will peak the meter, since in order to hit that hard, you will put undue wear on your kit and make lots of unnecessary acoustic noise.
Rim Settings
Rimshot Adjust is the balance between what hits will trigger the rim and which will trigger the head. If the number is too low or too high, hitting one zone (rim or head) might cause the other to trigger instead. You want to find the sweet spot where hitting the rim pad only triggers the rim sound, while hitting the head pad only triggers the head sound. It takes a bit of trial and error to get this important setting just right. Make sure to hit with different dynamics when making this setting.
Rim Gain will help you to equalize the volumes of the 2 different pads that have been split. You can adjust this to make the pads comparable in volume and can also adjust levels in the volume mixer to fine tune, if necessary.
Additional Settings
Retrigger Cancel and/or Mask Time should be adjusted if double triggering occurs, just like on any drum trigger.
Scan Time adjustments might be needed on some setups to fine tune results. These can be used to produce more consistent triggering and velocity results.
Electronic Drum Splitter Settings Summary
This is certainly not a guide that can possibly cover every possible splitter being used on every single drum module. However, the tips outlined here will work with most splitters and most modules, so give them a try. The best drum trigger splitters come with excellent instructions and as long as you follow them, you will enjoy satisfying results. Best of luck!
If you have not yet read part 1 of this tutorial, please go back and read How to Use Electronic Drum Trigger Splitters to get a bigger picture view.

